안드로이드 - 알람 노티피케이션, sms 발송 안드로이드 이야기2012. 8. 11. 11:14
안드로이드 - 알람 노티피케이션, sms 발송
Displaying Status Bar Notifications in Android

Developers of Android are no doubt familiar with the Toast class, which displays a little pop-up containing whatever message you want to display to the user. However, the Toast pop-up will automatically dismiss itself after a while, making it useful as a tool to provide timely feedback to the user (such as informing the user that a file has been saved successfully), but not a really good tool to use for some asynchronous action (such as telling the user that an incoming SMS message has arrived). For the latter, you can make use of the Status Bar Notification feature of Android, which displays a persistent notification on the status bar of your Android device. This notification can be dismissed when the user has read it, and thus this makes it a good tool for delivering notifications to the users to respond at their convenience. In this article, I shall walk you through the steps to creating status bar notifications for your Android application.
Creating the Project
Using Eclipse, create a new Android project and name it UsingNotifications (see Figure 1).
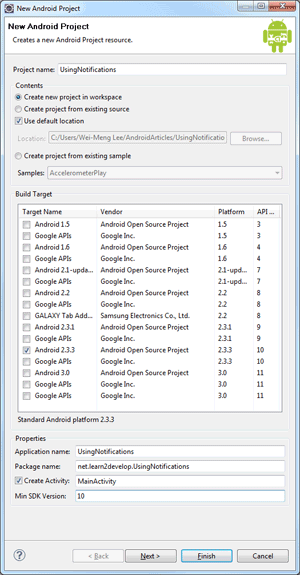
Figure 1 Creating the project
For this project, you will be building a simple alarm system that allows the users to set a date and time for the alarm to trigger. Once the specified date and time is reached, you will display another activity containing some additional information.
First, modify the main.xml file as follows:
<?xml version="1.0" encoding="utf-8"?>
<LinearLayout xmlns:android="http://schemas.android.com/apk/res/android"
    android:orientation="vertical"
    android:layout_width="fill_parent"
    android:layout_height="fill_parent" >
<TextView
    android:layout_width="fill_parent"
    android:layout_height="wrap_content"
android:text="@string/hello" />

<DatePicker android:id="@+id/datePicker"
    android:layout_width="wrap_content"
    android:layout_height="wrap_content" />
<TimePicker android:id="@+id/timePicker"
    android:layout_width="wrap_content"
    android:layout_height="wrap_content" />
<Button
    android:id="@+id/btnSetAlarm"
    android:layout_width="fill_parent"
    android:layout_height="wrap_content"
    android:text="Set Alarm" />

</LinearLayout>
This creates the UI as shown in Figure 2.
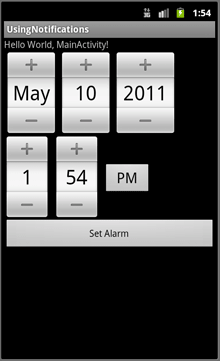
Figure 2 The UI for the application to set the date and time for the alarm
Add a new XML file to the res/layout folder and name it alarmdetails.xml. Populate it as follows:
<?xml version="1.0" encoding="utf-8"?>
<LinearLayout xmlns:android="http://schemas.android.com/apk/res/android"
    android:orientation="vertical"
    android:layout_width="fill_parent"
    android:layout_height="fill_parent" >
<TextView
    android:layout_width="fill_parent"
    android:layout_height="wrap_content"
    android:text="Details of the alarm..." />
</LinearLayout>
This creates a very simple UI with a message as shown in Figure 3.
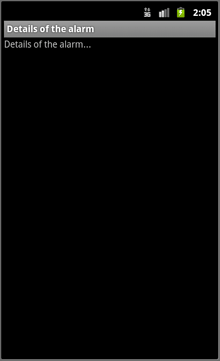
Figure 3 The details activity
Add a new Class file to the net.learn2develop.UsingNotifications package and name it AlarmDetails.java. Populate it as follows:
package net.learn2develop.UsingNotifications;

import android.app.Activity;
import android.os.Bundle;

public class AlarmDetails extends Activity {
    @Override
    public void onCreate(Bundle savedInstanceState)
    {
        super.onCreate(savedInstanceState);
        setContentView(R.layout.alarmdetails);
    }
}
Add the following block of code in bold to the AndroidManifest.xml file:
<?xml version="1.0" encoding="utf-8"?>
<manifest xmlns:android="http://schemas.android.com/apk/res/android"
      package="net.learn2develop.UsingNotifications"
      android:versionCode="1"
      android:versionName="1.0">
    <uses-sdk android:minSdkVersion="10" />
    <application android:icon="@drawable/icon" android:label="@string/app_name">
        <activity android:name=".MainActivity"
                  android:label="@string/app_name">
            <intent-filter>
                <action android:name="android.intent.action.MAIN" />
                <category android:name="android.intent.category.LAUNCHER" />
            </intent-filter>
        </activity>

        <activity android:name=".AlarmDetails"
            android:label="Details of the alarm">
            <intent-filter>
                <action android:name="net.learn2develop.AlarmDetails" />
                <category android:name="android.intent.category.DEFAULT" />
            </intent-filter>
        </activity>

    </application>
</manifest>
So basically, the user will select the date and time for the alarm to go off. Once the alarm goes off, it will display the AlarmDetails activity. The next section shows how to create the alarm.
Creating an Alarm
To schedule an alarm in Android, you can make use of the AlarmManager class. The AlarmManager class allows you to schedule an alarm to be triggered at a particular date and time.
Add the following statements in bold to the MainActivity.java file:
package net.learn2develop.UsingNotifications;

import android.app.Activity;
import android.os.Bundle;

import java.util.Calendar;
import android.app.AlarmManager;
import android.app.PendingIntent;
import android.content.Intent;
import android.view.View;
import android.widget.Button;
import android.widget.DatePicker;
import android.widget.TimePicker;

public class MainActivity extends Activity {

    TimePicker timePicker;
    DatePicker datePicker;

    /** Called when the activity is first created. */
    @Override
    public void onCreate(Bundle savedInstanceState) {
        super.onCreate(savedInstanceState);
        setContentView(R.layout.main);

        //---Button view---
        Button btnOpen = (Button) findViewById(R.id.btnSetAlarm);
        btnOpen.setOnClickListener(new View.OnClickListener() {

            public void onClick(View v) {
                timePicker = (TimePicker) findViewById(R.id.timePicker);
                datePicker = (DatePicker) findViewById(R.id.datePicker);

                //---use the AlarmManager to trigger an alarm---
                AlarmManager alarmManager = (AlarmManager) getSystemService(ALARM_SERVICE);

                //---get current date and time---
                Calendar calendar = Calendar.getInstance();

                //---sets the time for the alarm to trigger---
                calendar.set(Calendar.YEAR, datePicker.getYear());
                calendar.set(Calendar.MONTH, datePicker.getMonth());
                calendar.set(Calendar.DAY_OF_MONTH, datePicker.getDayOfMonth());
                calendar.set(Calendar.HOUR_OF_DAY, timePicker.getCurrentHour());
                calendar.set(Calendar.MINUTE, timePicker.getCurrentMinute());
                calendar.set(Calendar.SECOND, 0);

                //---PendingIntent to launch activity when the alarm triggers-
                PendingIntent displayIntent = PendingIntent.getActivity(
                    getBaseContext(), 0,
                    new Intent("net.learn2develop.AlarmDetails"), 0);

                //---sets the alarm to trigger---
                alarmManager.set(AlarmManager.RTC_WAKEUP,
                    calendar.getTimeInMillis(), displayIntent);
            }
        });
    }
}
The above code uses the Calendar class to obtain the current date and time. It then sets the date and time specified by the user and uses this information to arm the AlarmManager object. The PendingIntent object (displayIntent) is used to invoke the AlarmDetails activity when the alarm is triggered.
To test the application, press F11 to deploy the application on the Android emulator. Figure 4 shows the application running. Select a date and time that is later than the current time (a suggestion is to set it to one minute later) and wait for the alarm to trigger.
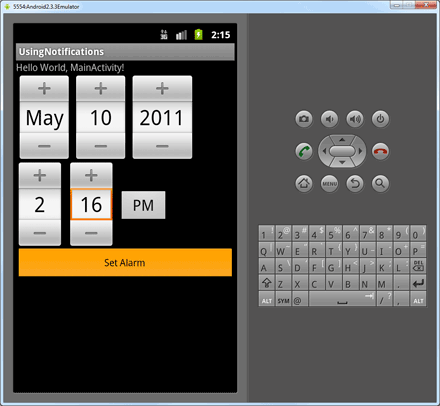
Figure 4 Setting the alarm
Once the alarm is triggered, you will see the AlarmDetails activity (see Figure 5).
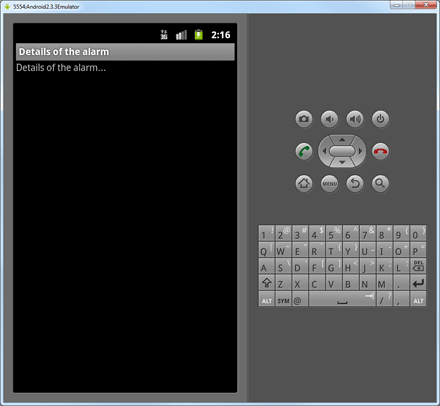
Figure 5 The alarm triggered and invoked the details activity
Creating Notifications
The previous example shows how you can schedule an activity to be launched at a particular time. However, the experience can be a little disruptive. Suppose you scheduled the alarm to trigger half an hour later. When the alarm is triggered, you might be doing something else and immediately, the screen will cut into the AlarmDetails activity. A better way to manage the experience is to put a notification into the status bar informing the user that the alarm has been triggered. The user can then respond to the notification at his convenience. Hence, in this section you will modify the project that you have created in the previous section to send a notification to the status bar when the alarm is triggered.
Add a new Class file to the package name and name it DisplayNotifications.java. Populate it as follows:
package net.learn2develop.UsingNotifications;

import android.app.Activity;
import android.app.Notification;
import android.app.NotificationManager;
import android.app.PendingIntent;
import android.content.Intent;
import android.os.Bundle;

public class DisplayNotification extends Activity {
    /** Called when the activity is first created. */
    @Override
    public void onCreate(Bundle savedInstanceState) {
        super.onCreate(savedInstanceState);

        //---get the notification ID for the notification;
        // passed in by the MainActivity---
        int notifID = getIntent().getExtras().getInt("NotifID");

        //---PendingIntent to launch activity if the user selects
        // the notification---
        Intent i = new Intent("net.learn2develop.AlarmDetails");
        i.putExtra("NotifID", notifID);

        PendingIntent detailsIntent =
            PendingIntent.getActivity(this, 0, i, 0);

        NotificationManager nm = (NotificationManager)
            getSystemService(NOTIFICATION_SERVICE);
        Notification notif = new Notification(
            R.drawable.icon,
            "Time's up!",
            System.currentTimeMillis());

        CharSequence from = "AlarmManager - Time's up!";
        CharSequence message = "This is your alert, courtesy of the AlarmManager";
        notif.setLatestEventInfo(this, from, message, detailsIntent);

        //---100ms delay, vibrate for 250ms, pause for 100 ms and
        // then vibrate for 500ms---
        notif.vibrate = new long[] { 100, 250, 100, 500};
        nm.notify(notifID, notif);
        //---destroy the activity---
        finish();
    }
}
This activity will be called by the AlarmManager object when the alarm is triggered. Its main use is to add a notification to the status bar through the use of the NotificationManager class. Here, when a notification is added to the status bar, you will also cause the device to vibrate, through the use of the vibrate property of the Notification object. Note that every notification you create in your application has a unique identifier so that later on you can use it to programmatically dismiss the notification. In this activity, the identifier is passed in from the MainActivity activity. The PendingIntent object (detailIntent) in this activity allows the user to invoke another activity when the notification is tapped. In this case, tapping the notification in the status bar will invoke the AlarmDetails activity. Finally, as this activity does not have an UI, you can simply call the finish() method at the end of the onCreate() method to destroy the activity.
Modify the MainActivity.java as shown in bold below:
package net.learn2develop.UsingNotifications;

import android.app.Activity;
import android.os.Bundle;
import java.util.Calendar;
import android.app.AlarmManager;
import android.app.PendingIntent;
import android.content.Intent;
import android.view.View;
import android.widget.Button;
import android.widget.DatePicker;
import android.widget.TimePicker;

public class MainActivity extends Activity {
    TimePicker timePicker;
    DatePicker datePicker;

    /** Called when the activity is first created. */
    @Override
    public void onCreate(Bundle savedInstanceState) {
        super.onCreate(savedInstanceState);
        setContentView(R.layout.main);

        //---Button view---
        Button btnOpen = (Button) findViewById(R.id.btnSetAlarm);
        btnOpen.setOnClickListener(new View.OnClickListener() {

            public void onClick(View v) {
                timePicker = (TimePicker) findViewById(R.id.timePicker);
                datePicker = (DatePicker) findViewById(R.id.datePicker);

                //---use the AlarmManager to trigger an alarm---
                AlarmManager alarmManager = (AlarmManager) getSystemService(ALARM_SERVICE);

                //---get current date and time---
                Calendar calendar = Calendar.getInstance();

                //---sets the time for the alarm to trigger---
                calendar.set(Calendar.YEAR, datePicker.getYear());
                calendar.set(Calendar.MONTH, datePicker.getMonth());
                calendar.set(Calendar.DAY_OF_MONTH, datePicker.getDayOfMonth());
                calendar.set(Calendar.HOUR_OF_DAY, timePicker.getCurrentHour());
                calendar.set(Calendar.MINUTE, timePicker.getCurrentMinute());
                calendar.set(Calendar.SECOND, 0);

                //---PendingIntent to launch activity when the alarm triggers---
                Intent i = new Intent("net.learn2develop.DisplayNotification");

                //---assign an ID of 1---
                i.putExtra("NotifID", 1);

                PendingIntent displayIntent = PendingIntent.getActivity(
                    getBaseContext(), 0, i, 0);

                //---sets the alarm to trigger---
                alarmManager.set(AlarmManager.RTC_WAKEUP,
                    calendar.getTimeInMillis(), displayIntent);
            }
        });
    }
}
Here, you simply make the AlarmManager invoke the DisplayNotification activity when the alarm is triggered. You use an ID of 1 to identify the notification. If you want to display multiple notifications, you must use a unique ID for each notification.
Modify the AlarmDetails.java as follows:
package net.learn2develop.UsingNotifications;

import android.app.Activity;
import android.app.NotificationManager;
import android.os.Bundle;

public class AlarmDetails extends Activity {
    @Override
    public void onCreate(Bundle savedInstanceState)
    {
        super.onCreate(savedInstanceState);
        setContentView(R.layout.alarmdetails);

        //---look up the notification manager service---
        NotificationManager nm = (NotificationManager)
            getSystemService(NOTIFICATION_SERVICE);

        //---cancel the notification---
        nm.cancel(getIntent().getExtras().getInt("NotifID"));
    }
}
The AlarmDetails activity will be displayed when the user taps on the notification on the status bar. In this case, once the activity is displayed, you will dismiss the notification using the cancel() method of the NotificationManager object. This method takes in the ID of the notification, which you have passed in earlier through the MainActivity and DisplayNotification activities.
Add the following code to the AndroidManifest.xml file:
<?xml version="1.0" encoding="utf-8"?>
<manifest xmlns:android="http://schemas.android.com/apk/res/android"
      package="net.learn2develop.UsingNotifications"
      android:versionCode="1"
      android:versionName="1.0">
    <uses-sdk android:minSdkVersion="8" />

    <uses-permission android:name="android.permission.VIBRATE"></uses-permission>

    <application android:icon="@drawable/icon" android:label="@string/app_name">
        <activity android:name=".MainActivity"
                  android:label="@string/app_name">
            <intent-filter>
                <action android:name="android.intent.action.MAIN" />
                <category android:name="android.intent.category.LAUNCHER" />
            </intent-filter>
        </activity>
        <activity android:name=".AlarmDetails"
            android:label="Details of the alarm">
            <intent-filter>
                <action android:name="net.learn2develop.AlarmDetails" />
                <category android:name="android.intent.category.DEFAULT" />
            </intent-filter>
        </activity>

        <activity android:name=".DisplayNotification" >
            <intent-filter>
                <action android:name="net.learn2develop.DisplayNotification" />
                <category android:name="android.intent.category.DEFAULT" />
            </intent-filter>
        </activity>

    </application>
</manifest>
Finally, you can now test the application. Press F11 in Eclipse to test the application on the Android emulator. When the application is loaded, select a time and click the Set Alarm button. Once this is done, click the Back button to dismiss the activity. When the alarm is triggered, you will see the notification on the status bar (see Figure 6).
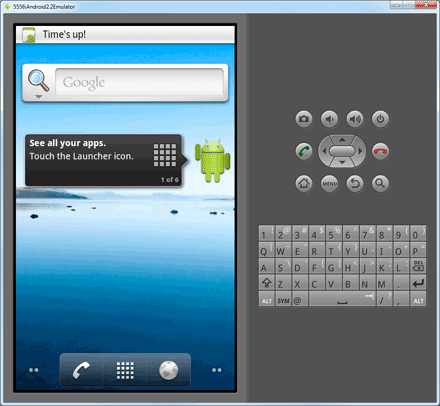
Figure 6 The status bar notification at the top of the screen
Clicking and dragging the status bar down will reveal the details of the notifications (see Figure 7).
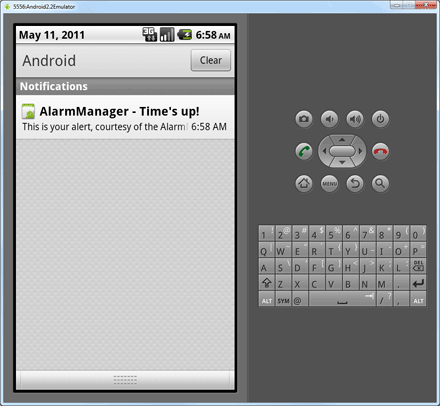
Figure 7 Viewing the notification
Clicking on the notification will display the details of the alarm (see Figure 8). At the same time, the notification is also removed.
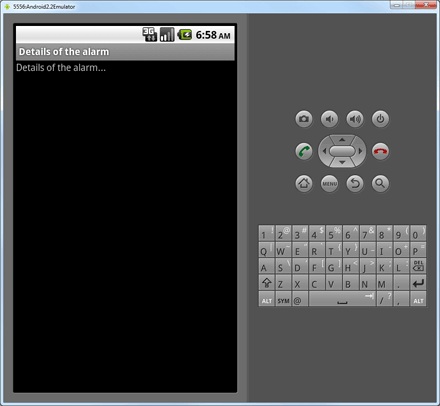
Figure 8 Viewing the details activity will remove the notification on the status bar
Interesting, for this example, you should test this on an Android 2.2 emulator. Testing this on the Android 2.3.3 emulator will result in a runtime error. The program crashed on this line:
        //---cancel the notification---
        nm.cancel(getIntent().getExtras().getInt("NotifID"));
It seems like the notification ID was not passed in correctly through the Intent object.
Summary
In this article, you have seen how to display a status notification in your Android application. Through this example, you have also got the chance to see how to use the AlarmManager class to set an alarm in your application.
'안드로이드 이야기' 카테고리의 다른 글
| 앱위젯만들기 - 배터리 표시기 (1) | 2012.08.11 |
|---|---|
| 안드로이드 - 각종 샘플 코드 리스트 링크 주소 (0) | 2012.08.11 |
| 안드로이드 - 스케줄 반복알람 (0) | 2012.08.11 |
| 안드로이드 - 알람 소스2 (1) | 2012.08.11 |
| android - 시간위젯으로 시간입력받기 - 시간변경 이벤트 처리 (0) | 2012.08.11 |


